One of my favorite parts about planning our wedding was getting the opportunity to bring out my creative side and complete some DIY (do it yourself) projects. These projects not only helped us save money, but also allowed me to make every detail exactly the way I envisioned it. I made all of the projects with the help of my Cricut Explore Air. If you don’t have one and love to create DIY projects, I highly recommend it! I have the first version which is still working great for me, but they are now selling the Explore Air 2 – linked HERE. I am highlighting a few of my favorite DIY projects from our wedding below.
This post contains affiliate links – read more about what that means here.

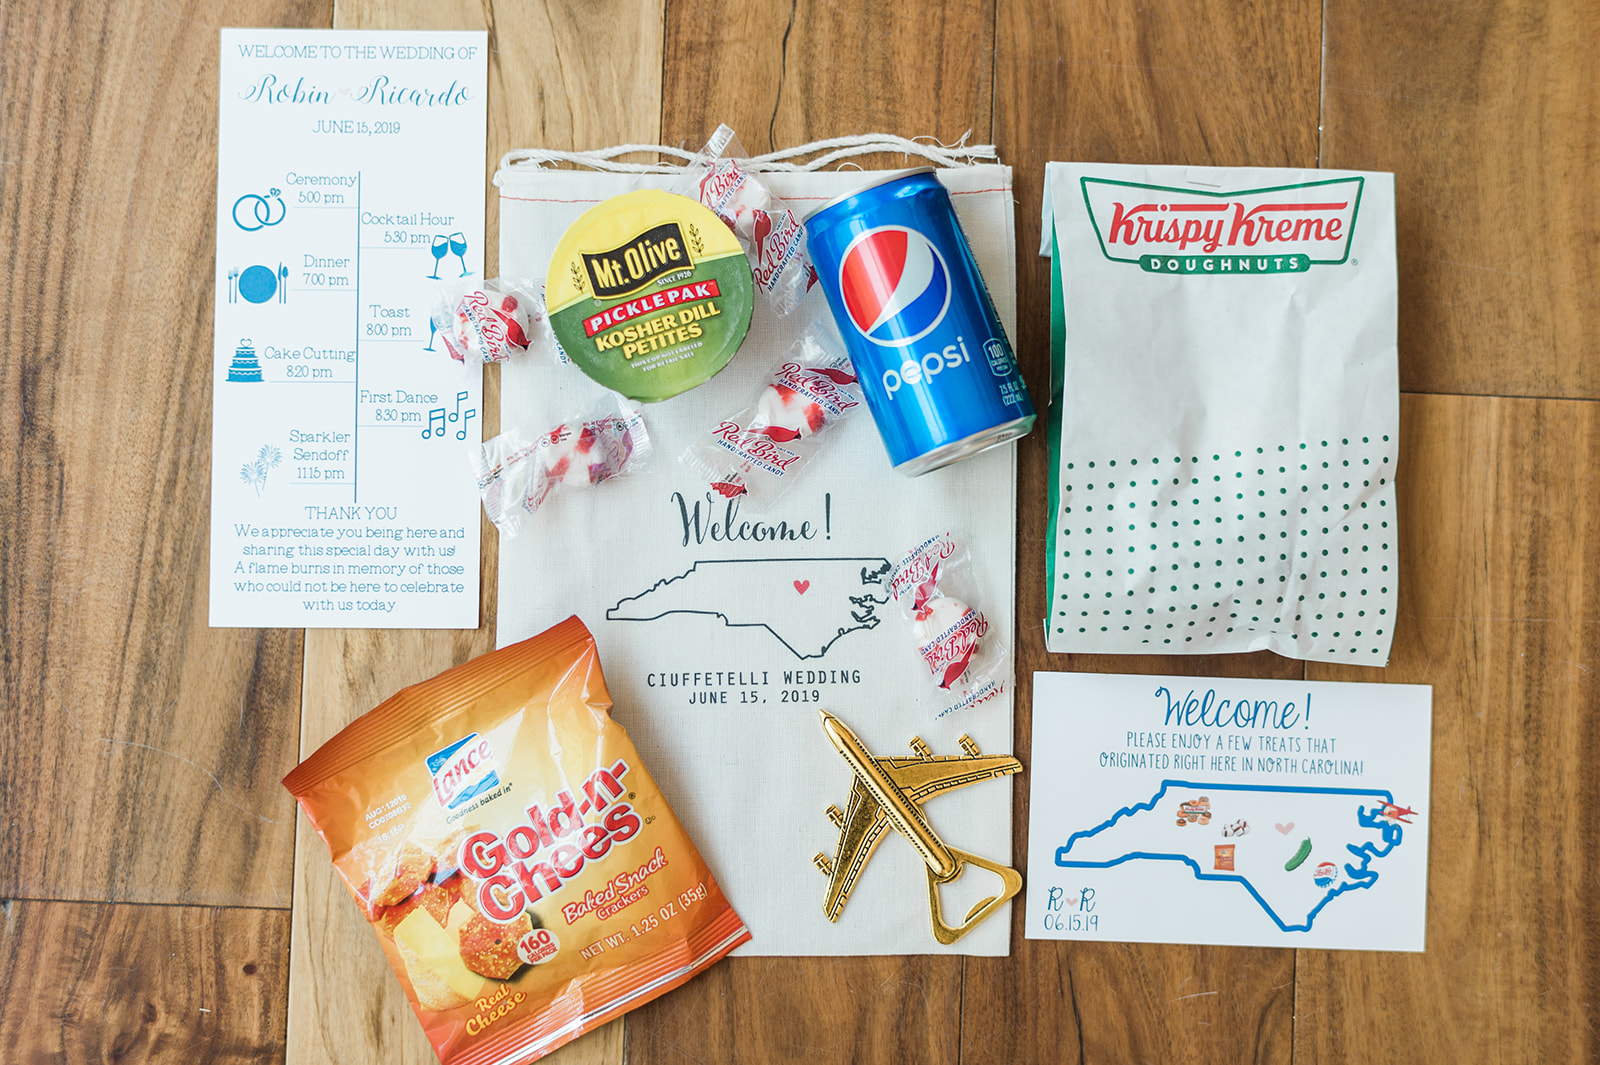
Welcome Bags – With so many guests coming from out of town, I wanted to do something special to show everyone how much we appreciated them coming. Many guests came from out of the state (or country), so I decided to make the welcome bag with a North Carolina theme. I bought the welcome bags themselves from Be Collective on Etsy and the link for them is HERE. Everything I put inside the bag showcased items invented in North Carolina. All of the items were bought from Amazon (minus the Krispy Kreme) so it was super convenient! I am linking the airplane bottle openers HERE. I used my Cricut to design the welcome cards with the NC map and the wedding timeline cards. The front desk passed out the bags to everyone who checked into the hotel from our room block. They were a hit!

Wedding Favors – Our wedding favors were something we didn’t decide on until the last minute! We wanted something that was a memento from our day that people could actually use. Once we decided on coasters, we searched online for weeks for the right ones. We found these coasters on Amazon and the link is HERE! They incorporated our wedding colors, had great reviews, and a plain cork back that allowed us to easily personalize them. A few of the coasters arrived cracked, but since we ordered through Amazon it was easy to exchange them. I loved the subtle touch the stamp added on the back. We bought the stamp from HelloLoveCoPress on Etsy and loved it – linked HERE! We also used the stamp for our thank you cards to get additional use out of it.

Calligraphy Addresses – This project was definitely the most time consuming out of all of them, but was SO worth it! I wanted the addresses for our invitations to be done in calligraphy, but the prices that I was quoted for getting it done were a bit steep. So I bought calligraphy pens for my Cricut and started a trial and error process of creating my dream invitations. I bought the calligraphy pens in a variety pack on Amazon – linked HERE. I typed each name and address into Cricut Design Space using font Emiline for the names and Telegram Text for the addresses. My advice if you’re going to do this project is start early! I did about 10-15 invitations per day. Also, invest in some basic envelopes to practice on before using the envelopes for your invitations.

Place Cards / Table Numbers: The place cards were also something I really wanted to have, but couldn’t justify buying when I knew I could create them myself. They were also fairly time consuming to complete, but they added such a nice touch to the table! In Cricut Design Space, I added each person’s name in font Stylish Calligraphy and table number in font Baskerville. I also included the meal choice icon which we needed for our plated meal to be served. Instead of using the pens, I printed them out and had the Cricut cut and score them for easy folding. The table numbers on the other hand took no time at all! I bought the frames from Amazon and the link is HERE. I used the same font to print the Table Numbers in our wedding colors and had the Cricut cut them out as well.

Bar Sign – This sign looked amazing on the bar at our wedding! I was able to create this for a little over $10! I bought the sign itself from Amazon – linked HERE. Then we stained it, and I created a white decal with my Cricut that showcased the bar options. The fonts I used are Autery and DK Moonlight Serenade.

Ring Box – Our ring box was another way we saved some money. We made it for under $5! The box is from Hobby Lobby for only $3.49 – linked HERE. We stained it and created a white decal with the same stain and font as the bar sign. Then we put some cloth on the inside. That’s it!
If you have any further questions about what I did for these wedding DIY projects, please feel free to reach out! Click HERE to see more details from our wedding! ♡ Missy Loves Jerry Photography took all of the pictures in this post!