I’ve been all about at-home beauty routines since quarantine has started (check out my DIY Nails post HERE). But my self tanning routine is one that I’ve been perfecting since before quarantine started. Some of these products and tips I’ve learned through research, reviews, and trying them out. But others I’ve learned through my friend and favorite spray tan artist Ellen from Southern Soleil! She is my go-to for big events, and she sprayed me for my wedding shower, wedding, honeymoon, and more. Make sure you follow her on Instagram for weekly tanning tips! I’m sharing below how I achieve a natural looking tan from home – no UV rays required!
This post contains affiliate links. Read more about what that means here.
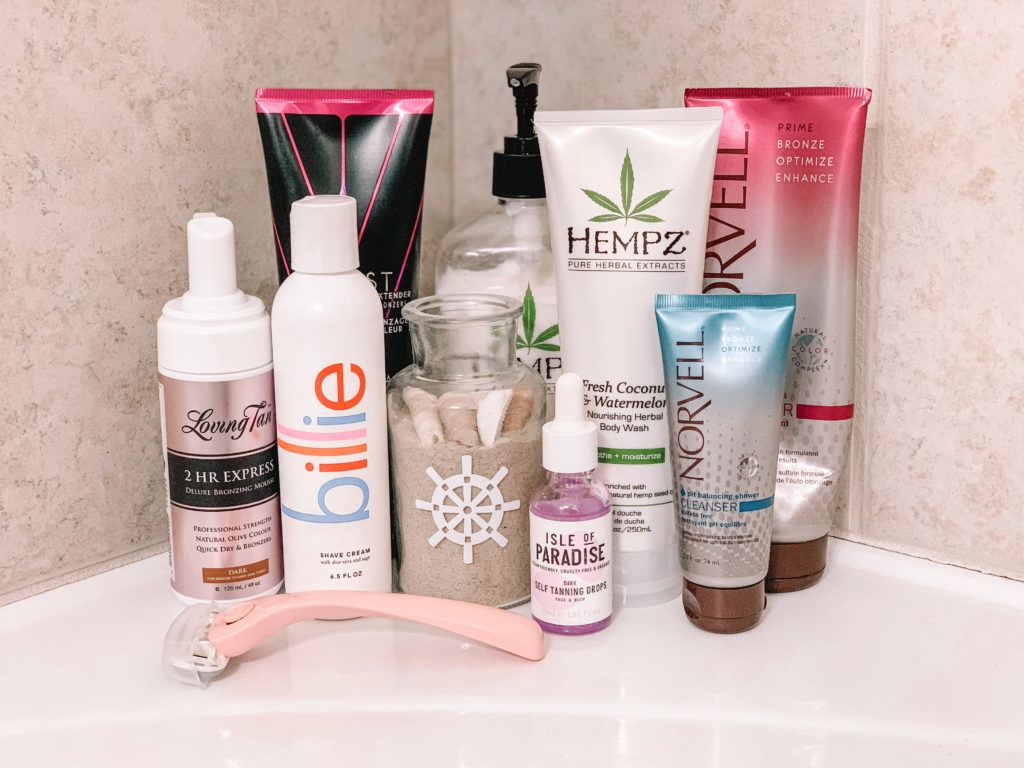
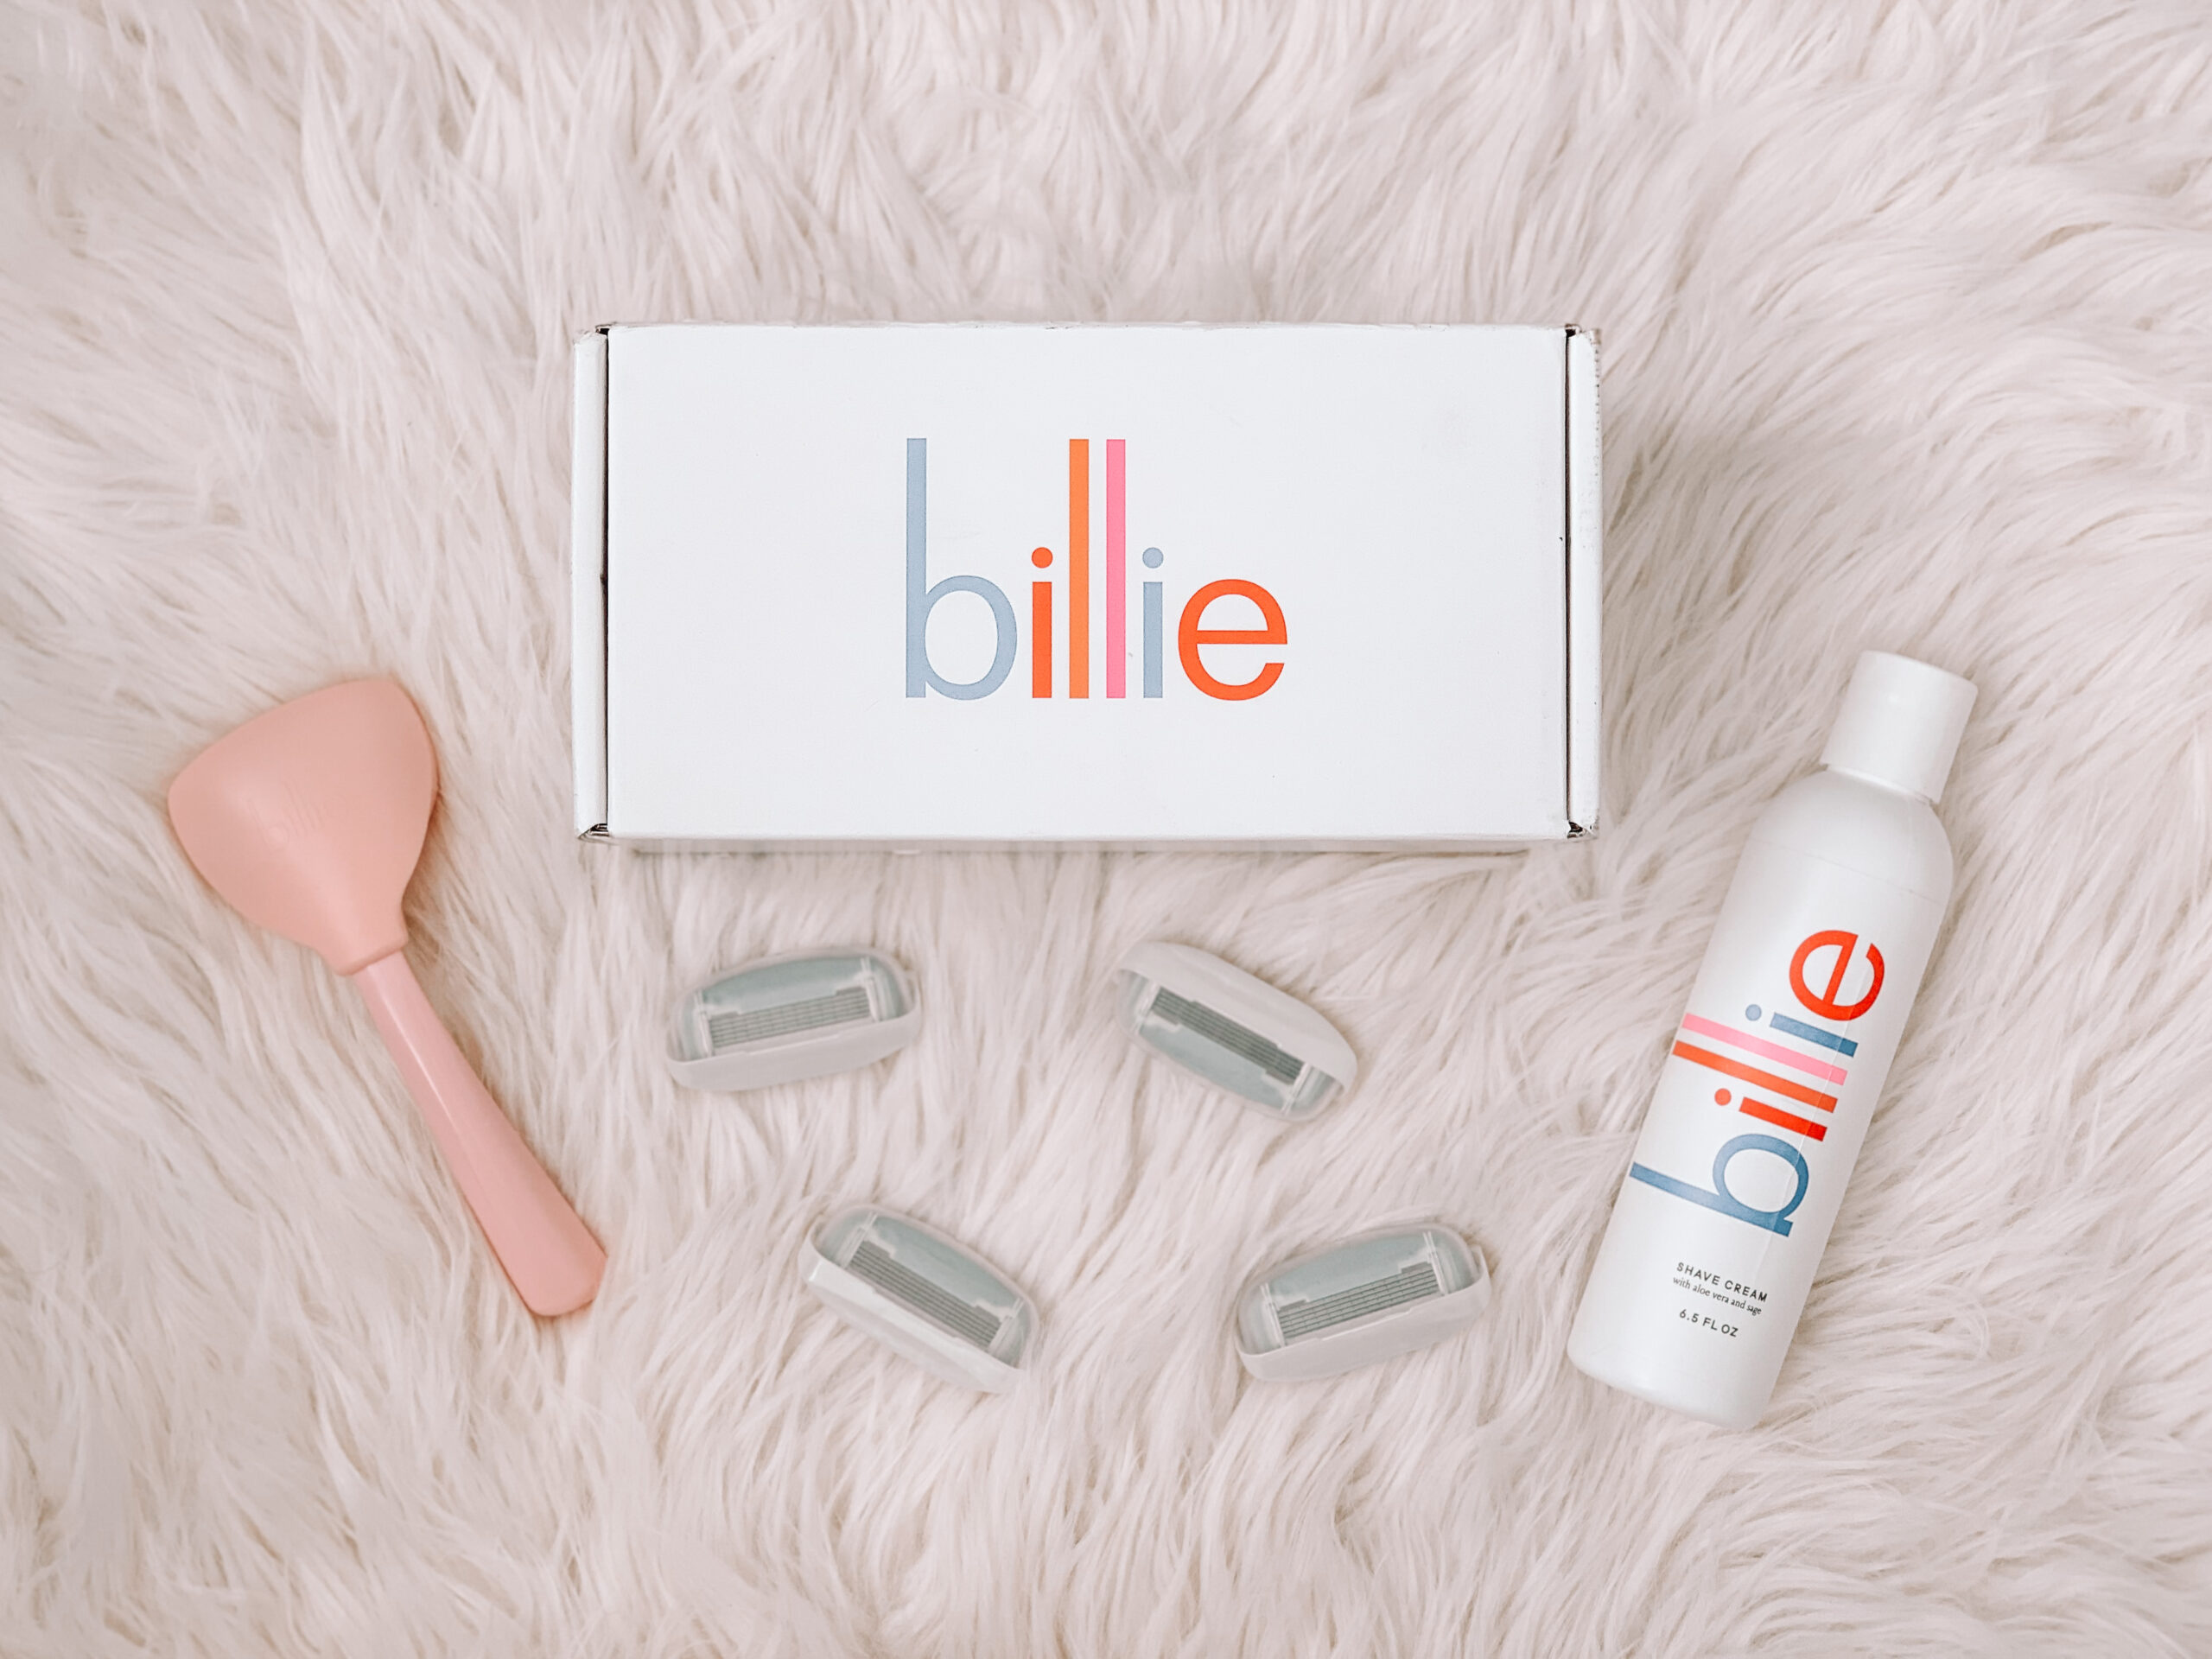
Step 1: The first thing I do is shave with my Billie razor. I’ve heard about Billie for the longest time but just recently tried it for myself. Let me tell you – the hype is real! I’ve also been loving subscription services during quarantine because of the convenience. For only $9 (shipping included) you get the Billie razor, 2 razor heads, and a magnetic clip to hold your razor in the shower. You can choose the frequency of your razor head refills (every 1, 2, or 3 months) and get 4 refill blades for only $9. No more buying expensive razor heads at the store for me! I also added their shaving cream (only $8) and love it! Click HERE to get started with Billie!
Step 2: The next thing I’ll do is exfoliate. You don’t want to miss this step! It removes dead skin cells and old self tanner, and helps your tan go on smoothly. I use this exfoliating mitt linked HERE. You can use it with regular body wash – the kind I’m currently loving is linked HERE.
Step 3: I normally don’t apply my self-tanner until the day after shaving and exfoliating. You always want to start by applying some lotion to the dry areas of your body (hands, feet, knees, and elbows). My favorite lotion is also the Hempz brand – linked HERE. Ellen introduced me to this brand because it has natural ingredients that won’t mess up your tan. My favorite self tanner is the Loving Tan brand linked HERE. And I always apply with a mitt – mine is linked HERE – to prevent getting self tanner on your hands and to help it go on smooth. Make sure you apply in circular motions until you no longer see any streaks.
Step 4: I apply the self tanner from Step 3 everywhere except my face. For my face, I use these self tanning drops linked HERE. They are AMAZING! You can also use these on your body if you prefer. You use them by adding a few drops to your moisturizer. I add 2-3 drops to my moisturizer from TULA every other night. By morning, my face has the prettiest natural glow. I’ve been using it for a while and it hasn’t given me any breakouts. I bought mine from Amazon, but they also sell it at other places like QVC and Sephora so make sure you price check before you buy!
Step 5: The last thing I’ll do is use products throughout the week to make my tan last longer. I love the Norvell pH balancing cleanser linked HERE. My tan typically lasts about a week. Once I notice it starting to fade, I’ll use the Norvell color extender linked HERE to make it last a few more days. I brought this on my honeymoon and used it every day. It worked great!
I highly recommend getting a professional spray tan by Ellen at Southern Soleil if you’re local. But in order to achieve a natural glow on a weekly basis from home, this self tanning routine is my go to!